
Not so long ago, between Covid 1.0 and Covid-Delta, I stopped in the garden center of a local box store. They have a TLC rack there. When I visit, it’s a lot like stepping up to a slot machine in a casino. You never know if you’ll get a winner.
Not so long ago, between Covid 1.0 and Covid-Delta, I stopped in the garden center of a local box store. They have a TLC rack there. When I visit, it’s a lot like stepping up to a slot machine in a casino. You never know if you’ll get a winner.

I always wanted to be a deejay. When I was younger, I had two turntables, a mixer, and crates and crates of vinyl records.
There was one small problem, though. I never wanted to get fingerprints or scratches on any of the records — which was why my vinyl collection remained in pristine condition, and the only deejaying was in my own mind.
Still, when it comes to thinking up headlines for posts, I often turn to music for inspiration — and this post about my aloe was no different. I began with “Aloe, I Love You,” courtesy of The Doors — because, I do love this plant.
Mine was a gift from Joe’s sister, Donna. She gave it to me years and years ago — and for those years and years, it was a typical northern houseplant, a solitary presence in a clay pot, brought outside in summer and over-wintered indoors.
I was thrilled to have an aloe — practical and beautiful, medicinal and magical. Each day seems to bring about new wondrous uses for the gel inside each of its pointy, succulent leaves.
The problem is that snapping off an aloe leaf to soothe a burn or an abrasion was never my first thought. No, I’d rather run for a bandage or even a store-bought “aloe” lotion than risk damaging the plant.
It was my deejaying debacle all over again — although this time I knew my being a gardener wasn’t an imaginary mind game. I just didn’t want to take advantage of a plant. I wanted it to be pristine.
But something exciting happened after bringing the aloe to Florida, where this houseplant could stay out all year long. Of course, there was the initial shock, but in time, the green became more vibrant and smaller aloes began to pop up all around the mother plant.

My clay pot for one had become my clay pot for many, and I wondered: Is this what aloe is supposed to do? It actually makes more plants on its own?
Then, Adele arrived with this lyric, “Hello, from the other side” — and I began to contemplate what was happening beneath the soil of said clay pot. In other words: Aloe, from the underside.

Just like removing a vinyl disc from its sleeve, I gently tapped the aloe from the only home it has ever known. And just like holding a record by its edges and turning it over to examine it for any imperfections, I observed and marveled at what was hidden by the clay pot.
The houseplant I had always counted on to be a solo artist was more like a member of a band. Once unpotted, the lead singer — for want of a better term — had developed a lengthy root system, each one traveling in a circle to match the shape of the clay pot.

It’s at this point that all record and deejaying analogies come to an end. While I may be a deejay in my mind, in reality, I’m a gardener —- and unlike my treatment of vinyl, I wanted to scratch at the soil, to separate the roots and smaller plants a bit, to clip and cut and leave my mark.
As I began, I first noticed that the thicker roots were actually runners, some of them ending with a small aloe plant — and each of these had its own set of roots and runners.


The larger of the small aloes were easily separated from the main plant, but the smaller ones needed some clipping.


I lined up pots of all sizes, as well as some hollowed out coconuts, for planting — so that each of the aloes could be a star in their own right — and, in time, fill out and make more plants.


The aloe that started it all was returned to its clay pot, now a bit roomier, so that it too could once again produce more plants.

At the end of the day, when it came time to reflect on what I had learned about aloe propagation and a headline, it seemed to make sense to name this post: “Aloe, ‘ow are you?” It’s really the question I asked myself — with a cockney accent, because a name like aloe kind of begs for that — whenever I looked at the clay pot filled with plants.
That being said, it’s time to bring my tale of aloe to a close — and in the sort-of words written by John Lennon and Paul McCartney: “You say goodbye, and I say aloe.”

If it’s one thing I have plenty of, it’s coconuts. In my tiny yard, there are 12 coconut-producing palms — and because coconut palms are always producing coconuts, you could say that I have a lovely and large bunch of them.
But when is a coconut not a coconut?

Hibiscus.
Summertime in South Florida, I’m told, is not the best time to plant or to garden. Locals often cite the high heat and high humidity — which leads to an abundance of pests and mildews.
So while gardens — and gardeners — in this hot area cool off, I’ve spent the time researching plants, dreaming up garden plans, and binge-watching television series. “Breaking Bad.” Done. “Orange Is The New Black.” Check. “Downton Abbey.” Finito.
Everything was moving along nicely until “Downton” introduced a gardener into Violet Crawley’s world, and I found myself hoping for a larger storyline for the young fellow or — even better — a spin-off. “Downton Gardens,” perhaps?
Nevertheless, as I pondered the idea of beginning a gardening program for the inmates on “Orange,” it occurred to me that I had had my fill of fictional gardens. I missed real gardening. There was a burning inside of me — as feverish as those felt by any of Walter White’s meth heads — to dig in the dirt, plant seeds, and root clippings.
So the other day, I caved in to my cravings and embarked on a binge of my very own. A garden binge, if you will.

Hibiscus.
I had been eyeing this hibiscus in the neighbor’s yard, blooming in the gap between our two houses. Each day, I’d walk by and that flower would wink its stamen at me. And since I’ve been looking for a Florida plant to take the place of hydrangeas, I wondered if I could root hibiscus the same way I was able to root my favorite shrub in my northern garden.
Out came the clippers, some cell packs, a shovel, and the rooting hormone. I did my best to clip non-bud branches, and then removed the lower leaves. The clippings were immediately placed in water to keep the stems moist.

I had also prepared the cell packs with basic garden soil and made holes in the center of each. After dipping the stems in rooting hormone, I slipped them into the pre-made holes, careful to not loosen the powdery rooting hormone. This was followed with a gentle watering, and then the small plants were placed out of direct sunlight.
Once started, though, I couldn’t get enough. I had merely had a sip of gardening and I was still achingly thirsty.

Croton
From the corner of my eye, I spotted the neighbor’s croton, a shrub with brightly colored foliage. There are many varieties of the plant, but I’m always drawn to the thin, slightly-curled leaf kind, each branch sharing green and red mottled leaves.
I again used the same rooting technique, planting up four small cuttings.
Not quite sated, I thought to myself, “If only I could dig up an actual plant, an off-shoot from a mother plant.” I crouched and crawled across the ground, lifting branches and looking beneath, sending small anoles scurrying.

Eventually, I found two small Chinese fan palms (Livistona chinensis) that had sprouted from seeds at the base of the mother tree. In time, this palm, with tiny hooks along the stems of the fronds, will reach up to 50’. Because of its slow growing habit, however, it’s often used as an understory planting.
I found the jackpot at the base of a Sunshine palm (Veitchia montgomeryana). There, seven smaller palms — resembling tall blades of grass — had sprouted. I carefully pried each one up and gave them a pot of their own.
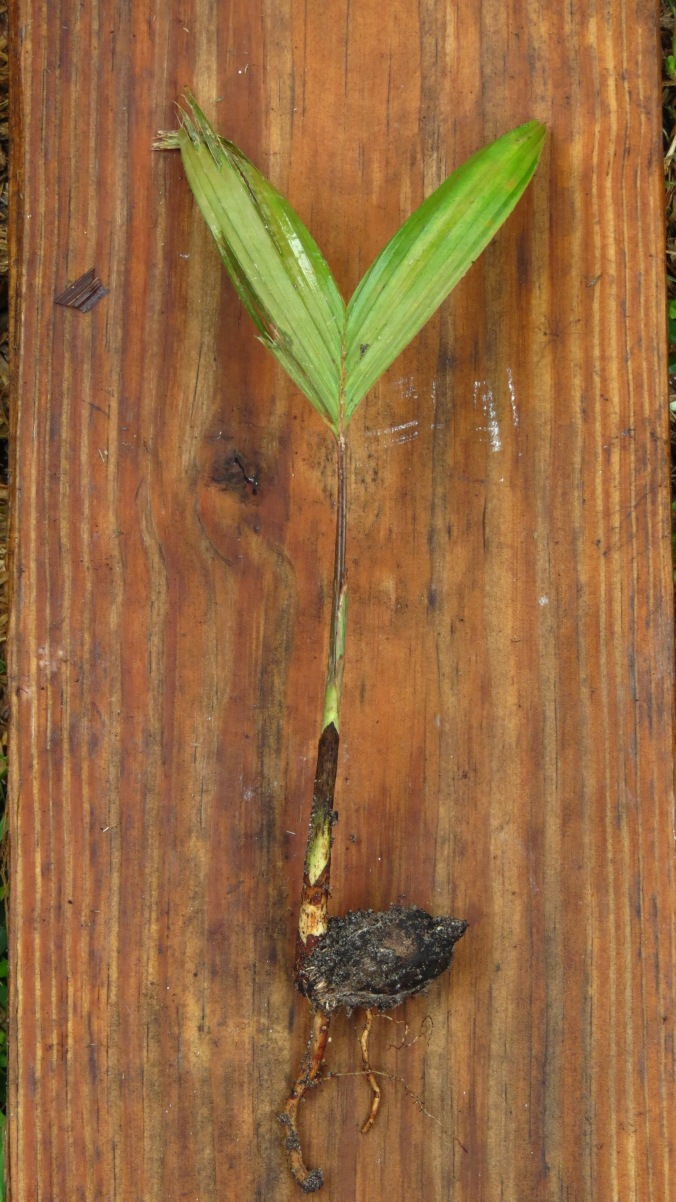
Sunshine Palm.
By the end of the day, my hands and fingernails caked with dirt, my clothes and forehead soaked with sweat, I took a look at all I had done to satisfy my gardening hunger. I had quite the tally: eight hibiscus, four crotons, two Chinese fan palms, and seven Sunshine palms.
At this point, I’m not sure if any of my treasures will survive — and if they do, I’m not sure if I’ll actually use them in the landscape or give them away. I don’t think I’d sell them, though. I’m not a plant pusher. I’m a binger.
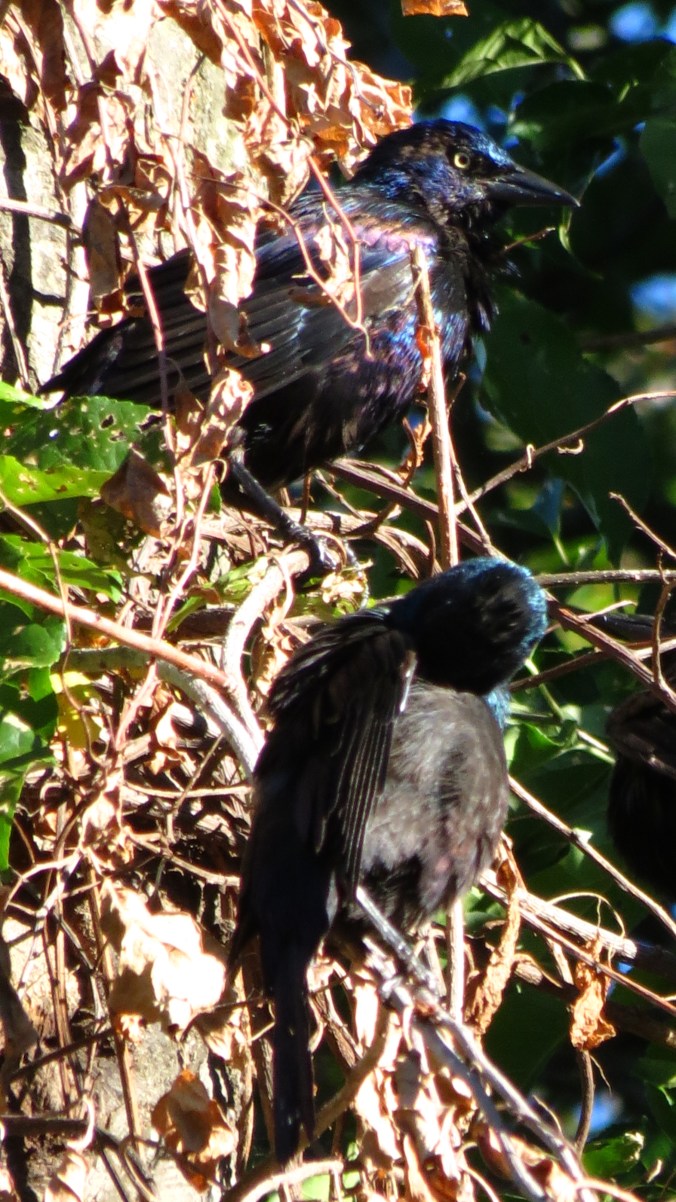
It’s been a week since a flock of grackles descended in the trees around my home and unleashed a hailstorm of acorns. I have since learned that acorns are one of the species’ culinary favorites, especially as the iridescent birds begin their migration south.
That being said, they aren’t very neat or efficient eaters. In fact, I don’t think the ’80s band A Flock of Seagulls could have caused this much of a mess in their hotel room, not even during the height of their popularity.
Seven days since their arrival — that’s seven days filled with more grackles, squirrels, and wind — the driveway and path looked as if they were the end-result of some slapstick comedy routine — you know, the one where an innocent passerby (me, for example) slips on some casually placed marbles (or acorns, as the case may be), so that the prankster (or grackle) can have a few laughs.
It’s Mother’s Day, and in my part of the world, it’s the day when every homeowner is given the nod to go ahead and start planting. In honor of the day, I thought I would make some Hydrangea babies that would make any mother — including the mother plant — proud.
1. In addition to a mother plant, you’ll need the following items (left to right): a dish with rooting powder, clippers, water, sandy soil, and a stick of some sort.

2. You’ll next have to select what parts of the mother plant you’d like to root. Tender green stems, preferably ones that are not ending in a bloom, work best.

3. Once cut, immediately place the stem in water. You can continue collecting stems for rooting — but always place them in water right away.

4. At this point, get the root starting cells ready. Sandy soil tends to work best because it’s not heavy, which is easier for developing roots. Use a stick (a chopstick or a pencil works great) to make a hole where the stem will be inserted.

5. Remove a stem from the water and trim off the larger leaves.

6. You will be left with something that looks like this.

7. Dredge the cutting, which is still damp with water, in the rooting hormone.

8. The rooting hormone should stick nicely because of the water. Make sure that the stem is as covered as possible.

9. Place the stem into the prepared soil, being very careful not to brush off the rooting hormone as you insert the stem into the hole. Once placed, gently tamp down the soil.

10. When all of your stems are planted, water them in and leave them in a sheltered location. I usually keep them along the back of the house, sheltered by the eave. Hydrangeas are fine with shade, but it’s important to protect these babies as best as you can — you know, like a good mother.

In a few weeks, you should be able to see which of your transplants has survived. When roots have developed, the baby Hydrangeas can be potted up. They may even be ready for planting, in a somewhat sheltered area, by fall so they can overwinter. In the spring, you’ll be able to transplant them to a permanent location or re-pot them to giveaway as, well, Mother’s Day gifts.
And on that note, I’d like to wish you a Happy Mother’s Day!
