
Over the past few months, I have been inundated with emails about my potting shed. Most people want to know where they could purchase the same kit. When I explain that the shed is Joe’s original design, they want specifics.
So with a lot of help from Joe, here is a post that has been a long time coming. Additional photos and information can be found in “The Potting Shed” tab above.
Before there was a potting shed, there was me — on a mission to start seeds in advance of the planting season, and Joe — on a mission to reclaim the kitchen and dining room from trays and flats of new sprouts. Surveying my long and leggy seedlings, I said, “If I had a potting shed, I’d be dangerous.”
Little did I know that that sentence, a seed traveling on waves of sound, would eventually settle into one of the folds of Joe’s brain, taking root and springing into action.
With a strong sense of style and design, plus an uncanny ability to think and analyze and see in 3-D, multiplied by math skills, Joe began to fill pages and pages of a legal pad with his ideas. If it were up to me, I probably would have purchased one of those greenhouses sold in catalogs. Joe, on the other hand, envisioned a shed that would not only blend with the style of the house, but one that would be beautiful by itself.
One thing that we learned early on is that when designing a potting shed, it’s very easy to get carried away with wants overtaking needs. There are toys and gadgets for every aspect of greenhouse gardening, but our primary need was to have a place that allowed me to start seeds, as well as a place that could hold yard tools and pool supplies. Once we figured out other necessities, it was time to build.
The Location:
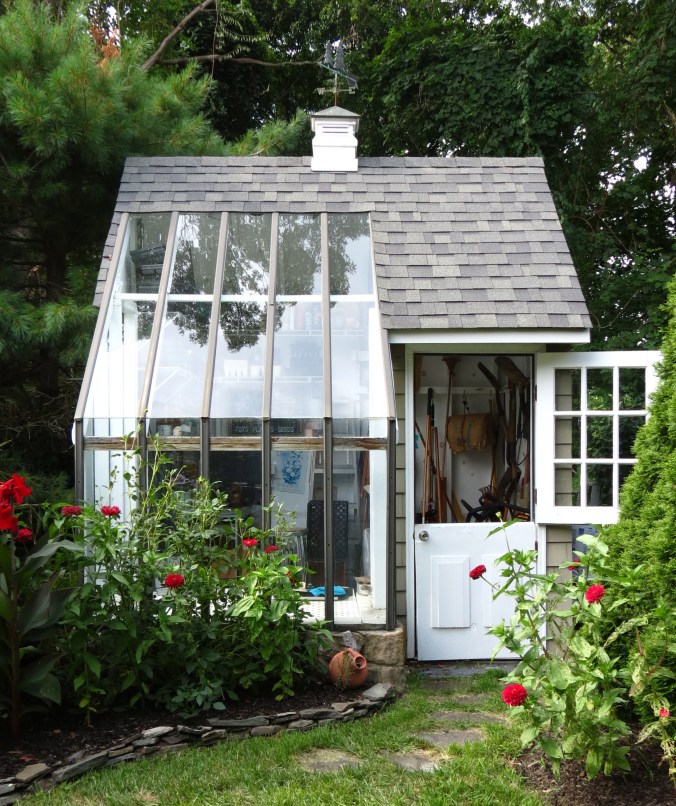
Using the parameters set out by our local municipality, we placed the shed in a corner of the backyard, a corner that had full access to southern exposure — an essential element during the winter months when young seedlings need light.

The Floor Plan:
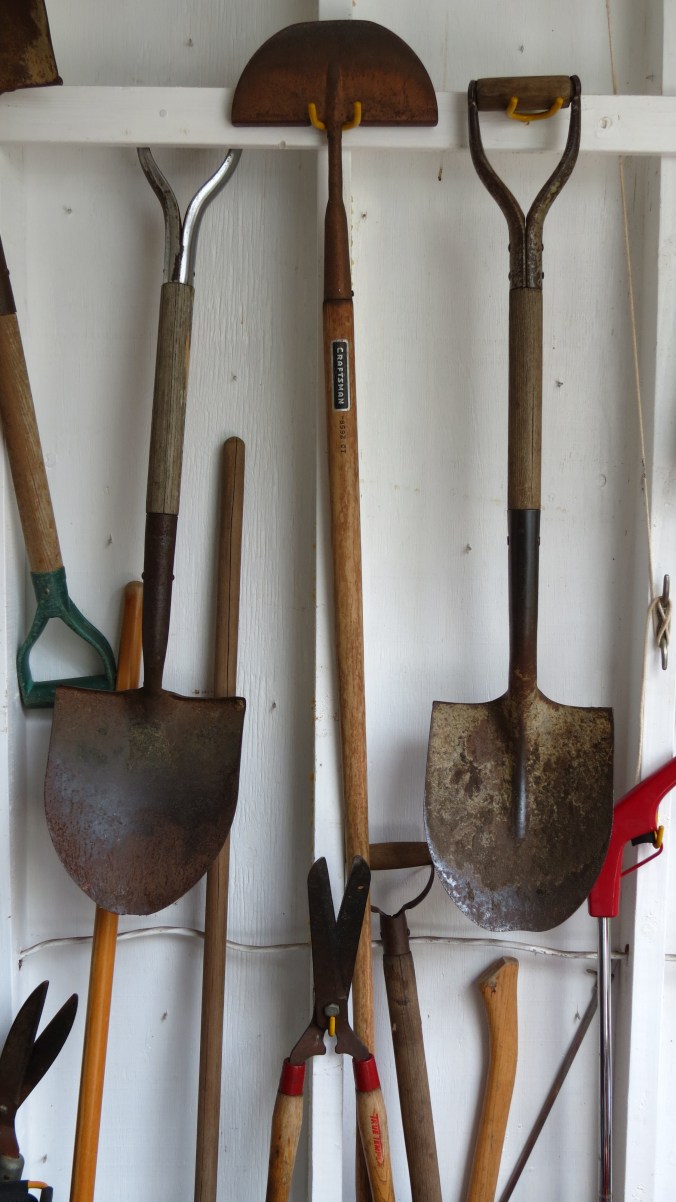
The shed roughly measures 10’ x 10’. As you open the door, you are standing in the shed area, where there is room for the lawn mower and an assortment of yard tools hanging on the walls. Above this area is the loft, where we store pool supplies and terra cotta pots over the winter.
The shed side.
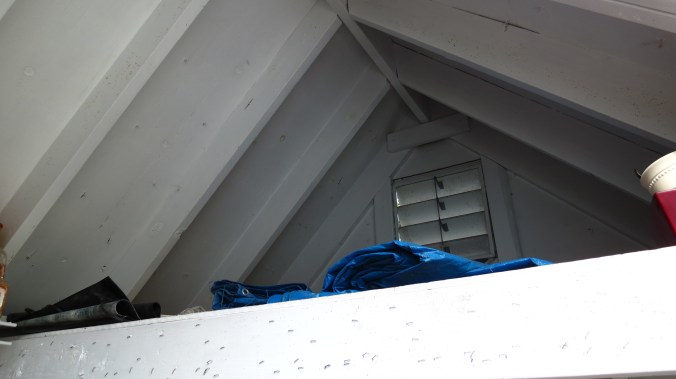
The loft space above the shed area.
On the left side is the potting area. This area is partly under a covered roof (the north side) and glass (the south side). In this area, you will find my potting bench and shelves filled with plastic pots and trays for seed starting.
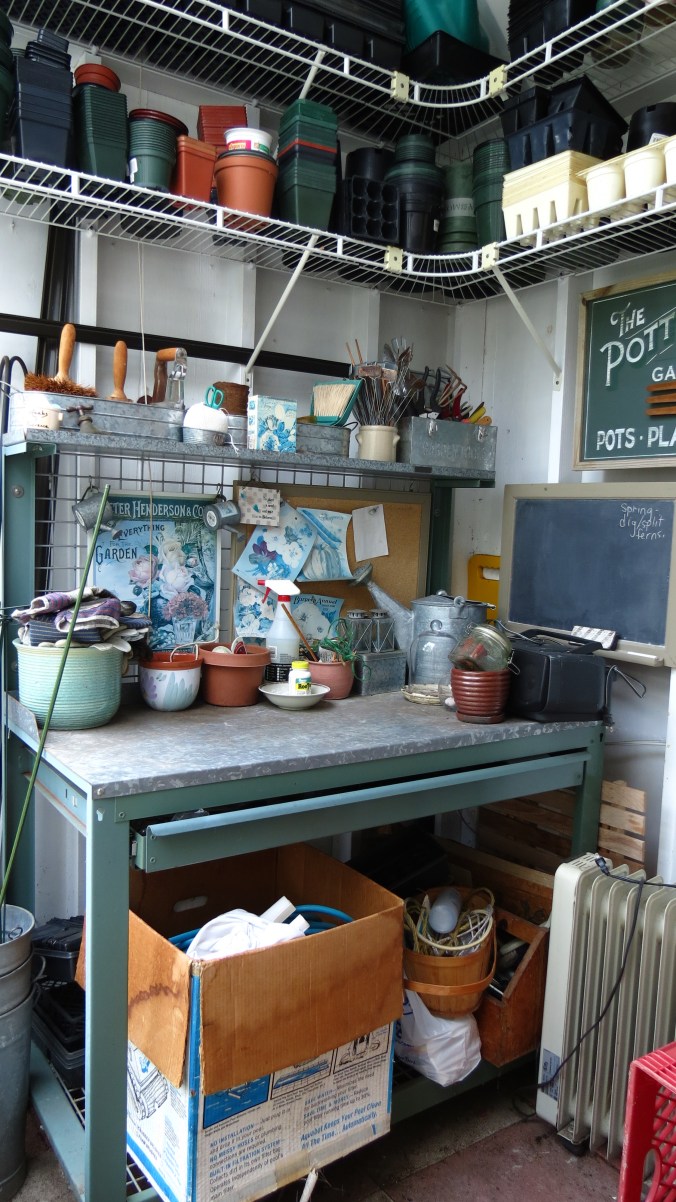
The potting side.
This area is also where the front of the shed bumps out, an area that is completely under glass. A piece of white lattice acts as a low table for holding flats of seedlings. Beneath this lattice is a bed of rocks, which helps with drainage after watering the new plants.
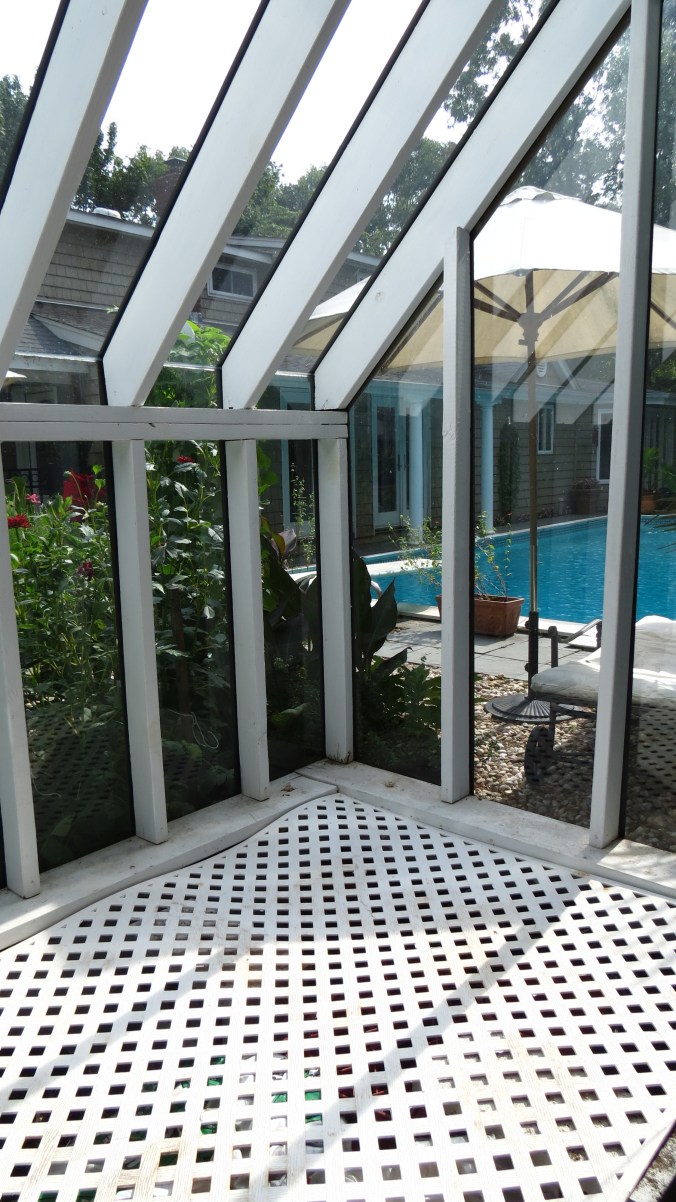
The seed starting area.
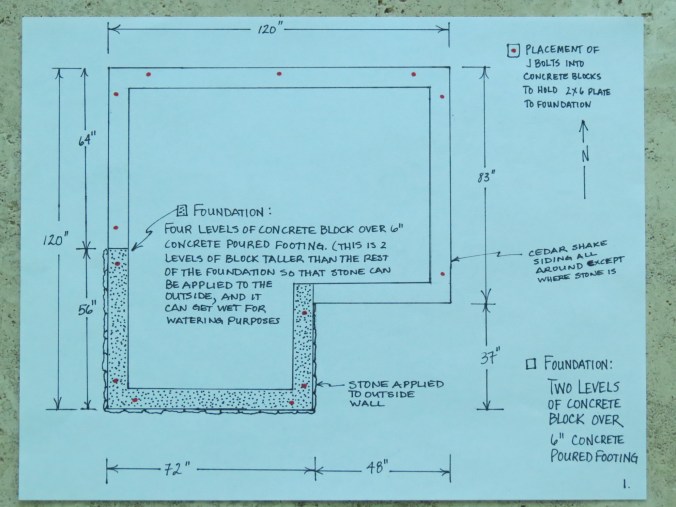
The Foundation:
The foundation has a poured concrete footing and two courses of 8” x 16” cement blocks. The floor is simple cement patio blocks, which were recycled from our old patio. The bumped out area in the front is four courses high of cement blocks, which were then covered with decorative fieldstone.


The Construction:
The structure is all-wood construction, using 2” x 4”, 2” x 6”, and 2” x 8” lumber. The exterior walls, roof, and loft floor are constructed of plywood sheets. The roof is covered with decorative shingles and then topped with a cupola.
There are many materials for the actual greenhouse area, such as Plexiglass and Lexan, both of which can help diffuse sunlight. We chose shatterproof glass, purchased from a local glazier, for aesthetic reasons. The tracks that hold the glass were purchased through a greenhouse supply catalog.
The interior was painted white to help reflect sunlight.
Electricity:
This was essential since there are so many items in the shed that require power. The heat mats (since seeds require bottom heat before they require sunlight), the space heater (necessary for cold winter nights), lighting (for evening visits to check on the little ones), and the radio (for music). While we wired the shed, we also had some outlets added to the shed’s exterior for electric yard tools.
Water:
We chose not to have running water in the shed, mostly because it required having a pipe travel a distance from the house to the shed — and in an area where the ground freezes, it just didn’t make sense. Besides, carrying jugs of water is a nice workout.
Humidity:
Humidity has always been the biggest issue for me. Although there are electric humidifiers available, I decided to make good use of what I had. I have found that a tray of water on the heat mats, as well as spilled water on the cement block floor, can create enough humidity — maybe not optimal, but enough.
Ventilation:
There are electric vents that can open automatically, but I chose the manual kind. There are two vents, a thin rope tied to each of the levers. The ropes then hang down so I can pull them to open the vents, tie them to mounted cleats to keep the vents open, or untie to close.

Preparing For Planting:
I usually start seeds in February, which is based on the last frost date in my Zone (6). Before I start any seeds, I have to help the shed retain heat. To do this, I hang plastic sheets to separate the shed side from the potting side. In addition, a plastic sheet is hung to create a false ceiling so that heat does not escape through the loft area.
Essential Tools:
Some items, I have learned, are essential for successful seed starting in the shed.
- A thermometer to help measure both maximum and minimum temperatures, as well as humidity.
- Heat mats to provide heat for newly planted seeds.
- A thermostat/timer for the heat mats to help regulate the bottom heat.
- A timer for the space heater to help regulate heat.
Additional Resources:
Greenhouse Gardener’s Companion by Shane Smith
Greenhouses for Homeowners and Gardeners by John W. Bartok. Jr.
For additional photos, please see the tab, “The Potting Shed,” above.

Love this! Simply reinforces the fact that I must have a potting shed some day! Pinning it to my garden shed Pinterest board for future reference 🙂
Hey Kat. Thanks for the Pin! And, yes, you should have a potting shed — in the long run, it’s cheaper than a gym membership, yoga classes, and therapy. 🙂
HOLY FRICKIN’ CRAP! I am in LOVE with your shed. When can I move in? LOL! You two are amazing. I am in awe of your awesomeness.
LOL! (And I can add a few other letters in there to make it more colorful!) I think the shed is a little too hot to be a permanent residence, but maybe on a seasonal basis?
I’ll stay in the main house then. You don’t mind, do you? 😉
Not at all!!! 🙂
Sweet!
🙂
I might be launching my new blog this weekend. If I do, I’ll let you know.
Hey, btw, did I mention to you that I saw Billy Idol this past May and Cyndi Lauper in July with my GBFF at Foxwoods Casino? OMG! They both put on unbelievably awesome shows. Billy looked so frickin’ HOT! In fact, I think he looks better now than when he was younger. Figures, right? As for Cyndi she was jumping around on stage like a 20 year old even though she’s SIXTY! Gulp!
🙂
What a fantastic blog post! I’ve always wanted a well thought out potting shed and the sketches make it look easy. I’m going to give it a try!
Hey Denise. I hope you give it a shot. It’s well worth the time and effort. Thanks for commenting!
this is a 5 star pottingshed !!!! lucky you !!!
Hi Gwennie. Thanks! Like I always say, five minutes in the potting shed is better than an hour of therapy. 🙂
so true !
Now I have potting shed envy.
Hey Lori. Should I hire out Joe?
Beautifully crafted and thought out.
Hi Bridget. Many thanks. Like I said, it works for what I need it to do.
What a wonderful gift from Joe!
Hey Chad. Yeah, he’s a good guy. 🙂
I was just admiring your potting shed/greenhouse combo! A wonderful labor of love 🙂
Thank you. It’s a cool place to be in a hot kind of way. 🙂
Joe has an incredible eye for design. I would so live in this.
Hey Nil. You might need some air conditioning — especially in the summer. The nice part is looking at it from the outside in the summer, and then looking out from it during a snowstorm.
This is amazing. I am quite jealous!
Thank you. It’s one of my favorite places in the yard.
Wow! I didn’t even know I wanted a potting shed until I saw this. If Joe wants to practice his design and building skills so that he doesn’t get rusty, I’d be happy to help :-).
LOLing, Jean! I’ll pass that offer on to Joe — although his head might swell and he’ll never fit into a car to drive up to your part of the country. 🙂 In all seriousness, though, I think you would love a potting shed — and you would be able to make magic happen!
Very interesting to see the story behind the creation..so much thought, creativity, knowledge, but most importantly, love!!
Nicely said, Maria. 🙂
Your shed is amazing and I want one!! You guys are quite the talented twosome. 🙂
Aw shucks. 🙂 In all seriousness, thanks and I do hope you’re able to experience gardening in a potting shed. Great place to be in the bleak midwinter.
Would you down here & build me one? Just kidding, but I really do love it!!!!
LOL. I’m glad you like the shed — and for the record, we’ll work for food. 🙂
Wow Kevin I love the new Greenhouse! He did a wonderful job designing it and building too. Hmmm, could I borrow Joe? LOL!
Hey Lona. Joe is a handy guy. I’m trying to convince him that I should be hiring him out — but he’s not biting.
Of all the plans I’ve looked at for a Potting Shed, this one is the most beautiful and basically simple! I could just see myself puttering in this area. Thanks for sharing.
Hi Barb. Like I said, the goal was to create a space that suited my basic seed starting needs, provided some storage, and looked nice. So glad you liked it. Be well!
What a fabulous gardening shed, Kevin! I’m so happy for you. Joe did such an amazing job of designing too! I’m off to dream of a potting shed besides the space underneath my old cedar tree. If I had your potting shed, I’d practically live out there … I can just see it filled with orchids and my own daylily hybrids (I’ll keep dreaming). 🙂 All the best!
Hi Beth! Knowing what I know of your garden, I’m very positive that you would turn your potting shed into beautiful work space. Go for it! 🙂
what a delightful shed/greenhouse!
Hi Sharon. Glad you liked it!
Like this so much that I am going to build it… Creating a 3 Dimensional plan in Google SketchUp so I can build it before I build it…
Hi Howard. Sounds pretty cool. When you complete your 3-D drawing, I would love to see a copy of it.
What do your estimate the cost of this project to be?
Hi Diane. The shed was actually built about ten years ago. At that time, it cost just under $2,000. Hope this helps.
Sorry YOU!
No problem. 🙂
Can you tell me a bit about how you sealed the glass from leaking especially where the ceiling glass meets the wall glass? Also, do you have hail concerns where you are? I am in Texas and concerned about the glass.
Hi Kathy. We purchased metal stripping that held the planes of glass to the 2″ x 6″ roof rafters and wall studs. This stripping also came with rubber strips and a top piece that had to be manually attached. At the point where the roof glass meets the wall glass, we ran a bead of caulking. Never had a leak.
Long Island does get hail, although not Texas-size. The glass is safety glass, the kind that breaks into smaller pieces should it shatter.
Hope this helps.
Yes, thanks so much. We are in the process of building our potting shed/greenhouse based on your design! Thanks so much for the inspiration!
Hi Kathy. I’m flattered that you were drawn to our design. I hope that you have as much joy and green joy in yours as I had in mine. 🙂
Pingback: gardenfuzzgarden.com Potting Shed - THIS IS IT!!! This is what I want with a tad bit bigger shed part! Yes indeed! So Cool I can't stand it!!!! | gardenfuzzgarden.com
Thanks!
Congratulations to Joe for the design and build, the potting shed is a gardeners delight. And I even spied a blackboard – you certainly thought of everything. I think my favourite photo is the one of the beautiful tools hanging, ready and waiting for action
Hi Claire. Those hanging tools were my attempt at being neat and organized. In actuality, I use the tools and gently lay them somewhat close to where they should hang. And then, the shed becomes very messy and do a massive cleaning — only to start the same mess all over again. 🙂
Pingback: How To Build A Potting Shed | Do-It-Youself Fun Ideas
Thank you!
Pingback: Potting Shed | ardently
Thank you.
Pingback: Potting Shed | ardently
Thank you!
Pingback: Outdoor Love | Hana & George
Thank you!
That is an awesome potting shed! I would be dangerous too if I had one of those! My family would never see me!
Hi Sarah. I miss the shed — it’s been dormant since I’ve been in Florida. My only consolation is that Florida seems to be a living greenhouse!
Wow, this is incredible! Just exactly what I want at the end of my garden, somewhere for tools, plants and everything else as well. So inspiring and thank you for all the information and plans. I am going to try and persuade my husband to build one for us too!
Hello Wolves in London — great name, by the way — I’m so glad you found my site and enjoyed the potting shed tour. Hope it all works out for you. Be well!
Pingback: I want this so badly | Wolves in London
Thanks for the mention!
Hello there!! This is lovely!! I was wondering if u could possibly tell me roughly how much this project cost? I am looking for a similar idea for a tiny house. I love the windows and the openness. Thank u!!
Hi Lisa. Glad you enjoyed my potting shed. This was built some time ago for about $2,000. Prices have probably risen since then, and my partner and I did much of the work. Even the glaziers were excited about the project. Hope this helps!
Oh my gosh, your shed is one of the best I’ve seen so far. Absolutely gorgeous, especially that sun room. Definitely pinning this because building a new shed is on our To Do List this summer. Fantastic plans and instructions too – thank you!
Hi Marie. So glad you enjoyed and pinned the shed. Best of luck with your project — and happy gardening!
Pingback: Build Your Own Potting Shed
Thanks for the link. 🙂
Luv Luv this and all the comments. …have idea’s spinning in my head! I can so see combination of my hobbies into a potting shed/ art studio with adjoining sliding pocket door between so can hang out in all seasons……living in the mountains views all around. Thanks for posting. 😄 happy growing🍃
Hi Bonnie. Thrilled that we were all able to get your head spinning. It’s great to have a place to call your own. Be well!
Reblogged this on Carolinasea's Blog and commented:
I need one of these!
Many thanks for the reblog. 🙂
Pingback: Build Your Own Potting Shed | The Homestead Survival
Thank you!
Pingback: Potting Shed… – Pot Gardening Info
Pingback: Zelf Een Tuinhuis Bouwen: 15 Geweldige Voorbeelden Mét Bouwplannen
I love the garden shed! My husband and I are just beginning to garden. He has hesitations in building such a complex shed. He is new to building and has just begun to volunteer with Habitat for Humanity. Do you think this would be too much for his first project? Would love to hear your thoughts!
Hi Rebecca. I don’t think it’s complicated — just break it down into small, do-able steps. The most difficult part was getting the glass panels to slide along the tracks, but with patience. . . Best of luck. 🙂
What state is this fine shed in ?
Hello Bonnie. That shed is on Long Island, in New York State. 🙂
Pingback: Fairytale Backyards: 30 Magical Garden Sheds - The Veranda of ideas
Thanks for including my shed. 🙂
Pingback: 30 Cheap And Easy DIY Shed Plans • DIY Home Decor
Pingback: 35 Garden Shed Plans For Storing Garden Tools & Outdoor Stuff | The Self-Sufficient Living
Pingback: Zelf Een Tuinhuis Bouwen: 15 Geweldige Voorbeelden Mét Bouwplannen
Pingback: 5 Simple Ways to Your Own Shed Transformation -Decorated Life
Pingback: Fairytale Backyards: 30 Magical Garden Sheds | grugl
Pingback: As Seen On WordPress & HGTV | Nitty Gritty Dirt Man